
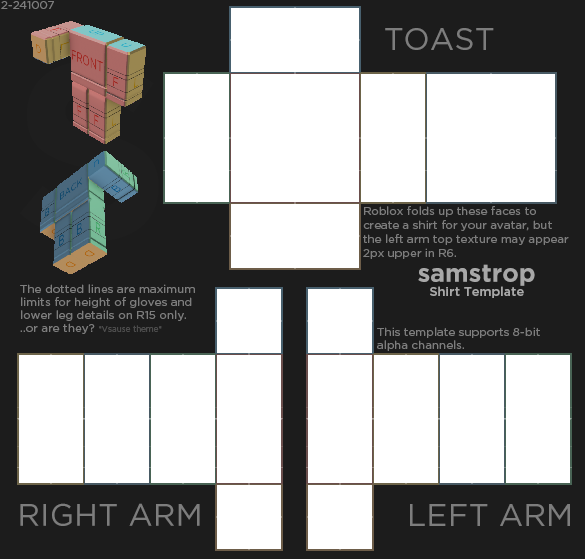
How to use the Roblox shirt template
- Download the 585×559 PNG above and open it in any image editor.
- Paint on a new layer above the template so the guide stays visible while you work.
- Keep the front torso rectangle for your main graphic; mirror any logo you place on the back panel.
- Hide or delete the guide layer and export a flat PNG at exactly 585×559 — do not resize.
- Preview it on a 3D avatar in Clothing Studio before spending the Robux upload fee.
- Upload at create.roblox.com → Creations → Classic Clothing → Shirts.
Shirt vs. T-shirt vs. pants
- Shirt — wraps the torso and both arms. Uses the 585×559 template.
- T-shirt — a flat decal stuck on the chest. Any square image works, 512×512 is the safe default.
- Pants — same 585×559 canvas, but the blocks map to the torso hips and both legs instead of the arms.
Skip the template entirely
Meshlox Clothing Studio takes any image — a logo, a photo, an AI render — removes the background, maps it onto the correct template panels for you, and shows the result live on a rotating R6 dummy. When it looks right, export the finished 585×559 PNG and upload.